![]() In this tutorial you will learn how to convert a png frame (i.e with some vehicle pictures) into an srf file for your garmin gps.
In this tutorial you will learn how to convert a png frame (i.e with some vehicle pictures) into an srf file for your garmin gps.
Follow our others tutorials in order to create the png file.
This tutorial only give you a tool (Mac users only) to allow this conversion.
- First you need a frame like this

- Save & name it “myvehicle.png”
- Download (see below) our tool precompiled for Mac : png2srf and decompress it in the same directory than the file “myvehicle.png”
- Launch this command line :
- png2srf myvehicle.png mygarmincursor.srf
- Install mygarmincursor.srf on your garmin GPS.
Enjoy your new cursor !

|
6th Jan 2013
|

![]() In this tutorial, you will learn how to manipulate sketchup to create automatically rotating vehicle’s pictures.
In this tutorial, you will learn how to manipulate sketchup to create automatically rotating vehicle’s pictures.
The goal is to obtain 37 pictures of a 3D vehicle. In another tutorial we learn to compose a complete frame with all the generated pictures.
First, download the free 3D software : sketchup
Advise : Try the different provided tools from sketchup : moving, rotating, zooming, camera…This will help you to place and modify your 3D model
I have made a script to rotate automatically a model and write png file every 10°.
- Download and install the provided script (see download at the end of the article)
- In order to install a script for Sketchup on MAC, copy the .rb file to /Library/Application Support/Google SketchUp 8/SketchUp/Plugins/garmin/ It is important to put this in a subdirectory, otherwise, the script will be automatically called when sketchup starts.
- Then, launch Sketchup.
- Here, you are ready to import a 3D model : Click on “file” menu and “3D Warehouse“. A browser lets you select your model : choose one !
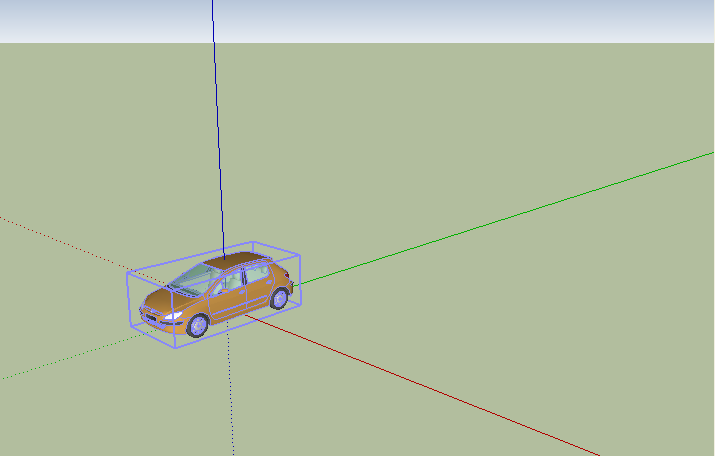
- When the download is over, you have to place your 3D model centered on the blue Z axis. It is important since the rotation is done around this axis.

- Move and center correctly your vehicle in the view, like in the following screenshot

- On your computer, create a directory called “vehicule” at the root of your hard drive. (You can change this in the ruby script)
- In “Windows” menu, select the “Ruby Console” and type load(“garmin/rotate.rb”)
- Verify that all the pictures are generated in the “vehicule” directory.
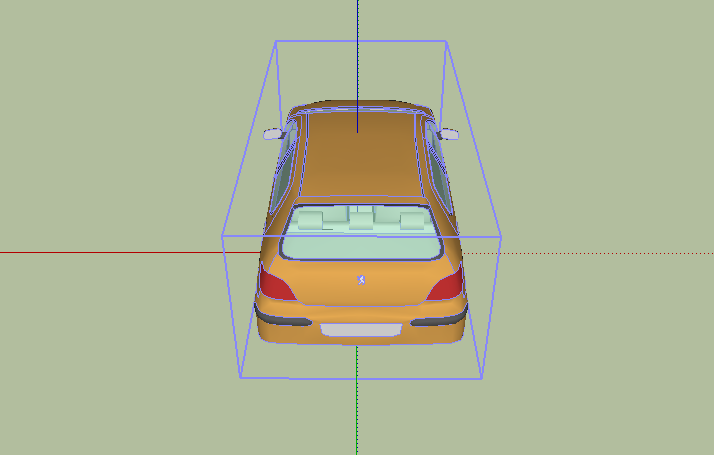
- You may have to position again (zoom or dezoom) your model, for the top view…and export it manually (80×80 pictures, png format)
Enjoy!

|
5th Mar 2011
|

![]() In this tutorial you will learn how to create automatically the garmin vehicle PNG frame with a gimp script fu.
In this tutorial you will learn how to create automatically the garmin vehicle PNG frame with a gimp script fu.
Gimp is a free picture editing software. It is very powerfull and has a script support.You can download it at http://www.gimp.org
When creating a custom garmin vehicle, you have to create 37 pictures of your vehicle (36 pictures with your spinning vehicle and 1 for the view of your vehicle from the top)
Here, we just want to compose a PNG frame with the 37 PNG pictures, like this :

This frame will then be directly used to generate an .srf file.
- Download and install the provided script (see download at the end of the article)
- In order to install a script fu for gimp on MAC, copy the .scm file into /users/”your username”/library/Application Support/Gimp/scripts/
- Then, launch Gimp software.
- Normally, you will find a new menu called “Batch”, here you will find your program : Garmin Vehicles PNG Frame. Click on it.
- Select the folder where you have generated your 37 pictures on PNG format.
- Select your picture’s name : For example, if you recorded my_car0.png, my_car1.png, my_car2.png….my_car35.png… and… my_car_dessus.png : write the name “my_car”
- Click on validate.
This will normally generate a file my_car_frame.png with your garmin vehicle.
This script is very usefull to create a PNG file that will be converted to .srf garmin compatible file.
Enjoy!

|
4th Mar 2011
|

![]() In this tutorial you will learn how to create automatically an animated gif with a gimp script fu.
In this tutorial you will learn how to create automatically an animated gif with a gimp script fu.
Gimp is a free picture editing software. It is very powerfull and has a script support.You can download it at http://www.gimp.org
When creating a custom garmin vehicle, you have to create 37 pictures of your vehicle (36 pictures with your spinning vehicle and 1 for the view of your vehicle from the top)
Here, we just want to compose an animated gif with the 36 PNG pictures, like this :

- Download and install the provided script (see download at the end of the article)
- In order to install a script fu for gimp on MAC, copy the .scm file into /users/”your username”/library/Application Support/Gimp/scripts/
- Then, launch Gimp software.
- Normally, you will find a new menu called “Batch”, here you will find your program : Garmin Vehicle Gif Animation. Click on it.
- Select the folder where you have generated your 36 pictures on PNG format.
- Select your picture’s name : For example, if you recorded my_car0.png, my_car1.png, my_car2.png….my_car35.png : write my_car
- Click on validate.
This will normally generate a file my_car.gif with your spinning vehicle.
This script is very usefull to preview your spinning vehicle !
Enjoy!

|
4th Mar 2011
|

![]() Animated vehicles for Garmin GPS are not so complicated to create. Some people have made great tools to do the job. I decided to share my experience with you because i think that everybody can do it.
Animated vehicles for Garmin GPS are not so complicated to create. Some people have made great tools to do the job. I decided to share my experience with you because i think that everybody can do it.
There are 3 steps to make your own cursor : make 36 pictures of your vehicle, assemble them into a png file, convert your png file to the garmin format : .srf.
Making 36(+1) pictures in 3D
First you have to download and install a 3D software on your computer :
- Blender : you can download this from http://www.blender.org
- Sketchup : you can download this from http://sketchup.google.com/intl/fr/download/
After the installation of one of this software, you will be able to choose a model (cars, trucks or anything you want) from officials repositories (or from a models dedicated site). Don’t be afraid, there are tons of models!
According to the 3D software, you then have to put your model on the 3D scene and center it from behind. Here, the idea is to rotate your model from 360° step by step (36 times 10°) and export the 36 pictures of the model in png format: The size of each picture must be 80×80.
Note that you must have a transparent background.
A final picture from the top of the model has also to be made (This will be used on the 2D map mode on your garmin)
You can following the Sketchup tutorial i have written.
Here you normally have : 37 pictures.
- model_0_deg.png
- model_10_deg.png
- model_20_deg.png
- …
- model_350_deg.png
- model_top.png
You can preview your spinning vehicle by following This tutorial.
Png frame generation
In the second part, you have to create a single and unique picture from the previous generated pictures (36+1).
First, i recommend you to download a free picture software editor :
- The Gimp : You can download it from : http://www.gimp.org
Create a 2881 x 160 picture, with transparent background.
Here, you can open the 36+1 pictures and add them to the 2881 x 160 frame as calcs.
Place the 36+1 pictures each 80 pixels in this order :
1st Row Top-left : model_0_deg model_10_deg ….model_350_deg : Top-right
2nd Row Low-left : model_top (just one picture)
You can use the grid option configured each 80 pixels in order to help you to place the picture.
Here you must have something like that : (as for me, you do not need the entire second vehicles line as the first picture from this line is rotated directly by the GPS when using the 2D map mode)
![]()
Save this to your computer.
If you do not want to do this job each time, just download and install our gimp script fu from this tutorial.
Png to srf convert
The last step is the png to srf online convert.
Congratuations, you have done it!


|
27th Feb 2011
|
Tags: 3D software, Garmin, garmin gps, model, png file, png format, sketchup, srf, tutorial, vehicle
|


